Being part of the Cartoons and Cocktails show has been an amazing journey. To start the project for my piece, I had to figure out what cartoon I was going to draw/paint. Spent a lot of time planning in my head, but for reference, the show is supposed to be about my favorite cartoon. The idea is that this group art show celebrates the timeless joy and nostalgia of cartoons, highlighting how these beloved characters continue to bring warmth and laughter from childhood into adulthood. I went with the turtles due to their serious nature, from their early beginnings in comics to their fun-loving nature in the cartoons and movies. The turtles were some of the first non-superhero comics I owned/read. I even went to see them in concert after one of the movies. Turtle power is going strong with a new iteration every once in a while for a new or next generation to grow up with.
I almost love defining/documenting a process for making art more than the final product.
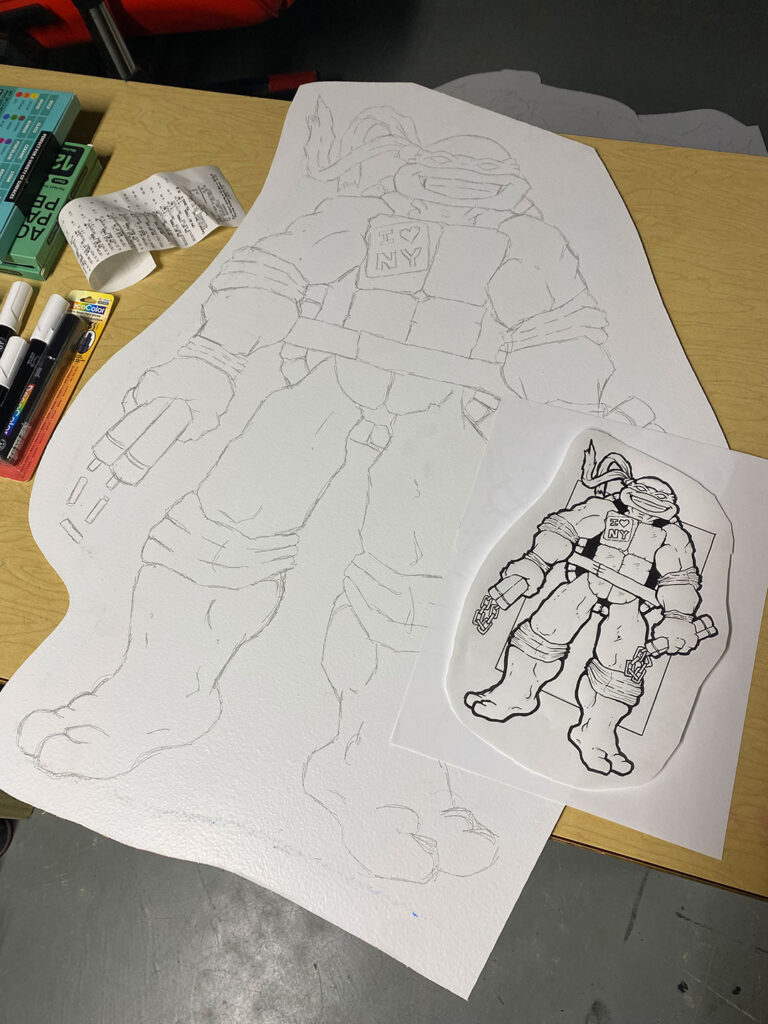
Part 1: Ideas, sketches, and inked drawings
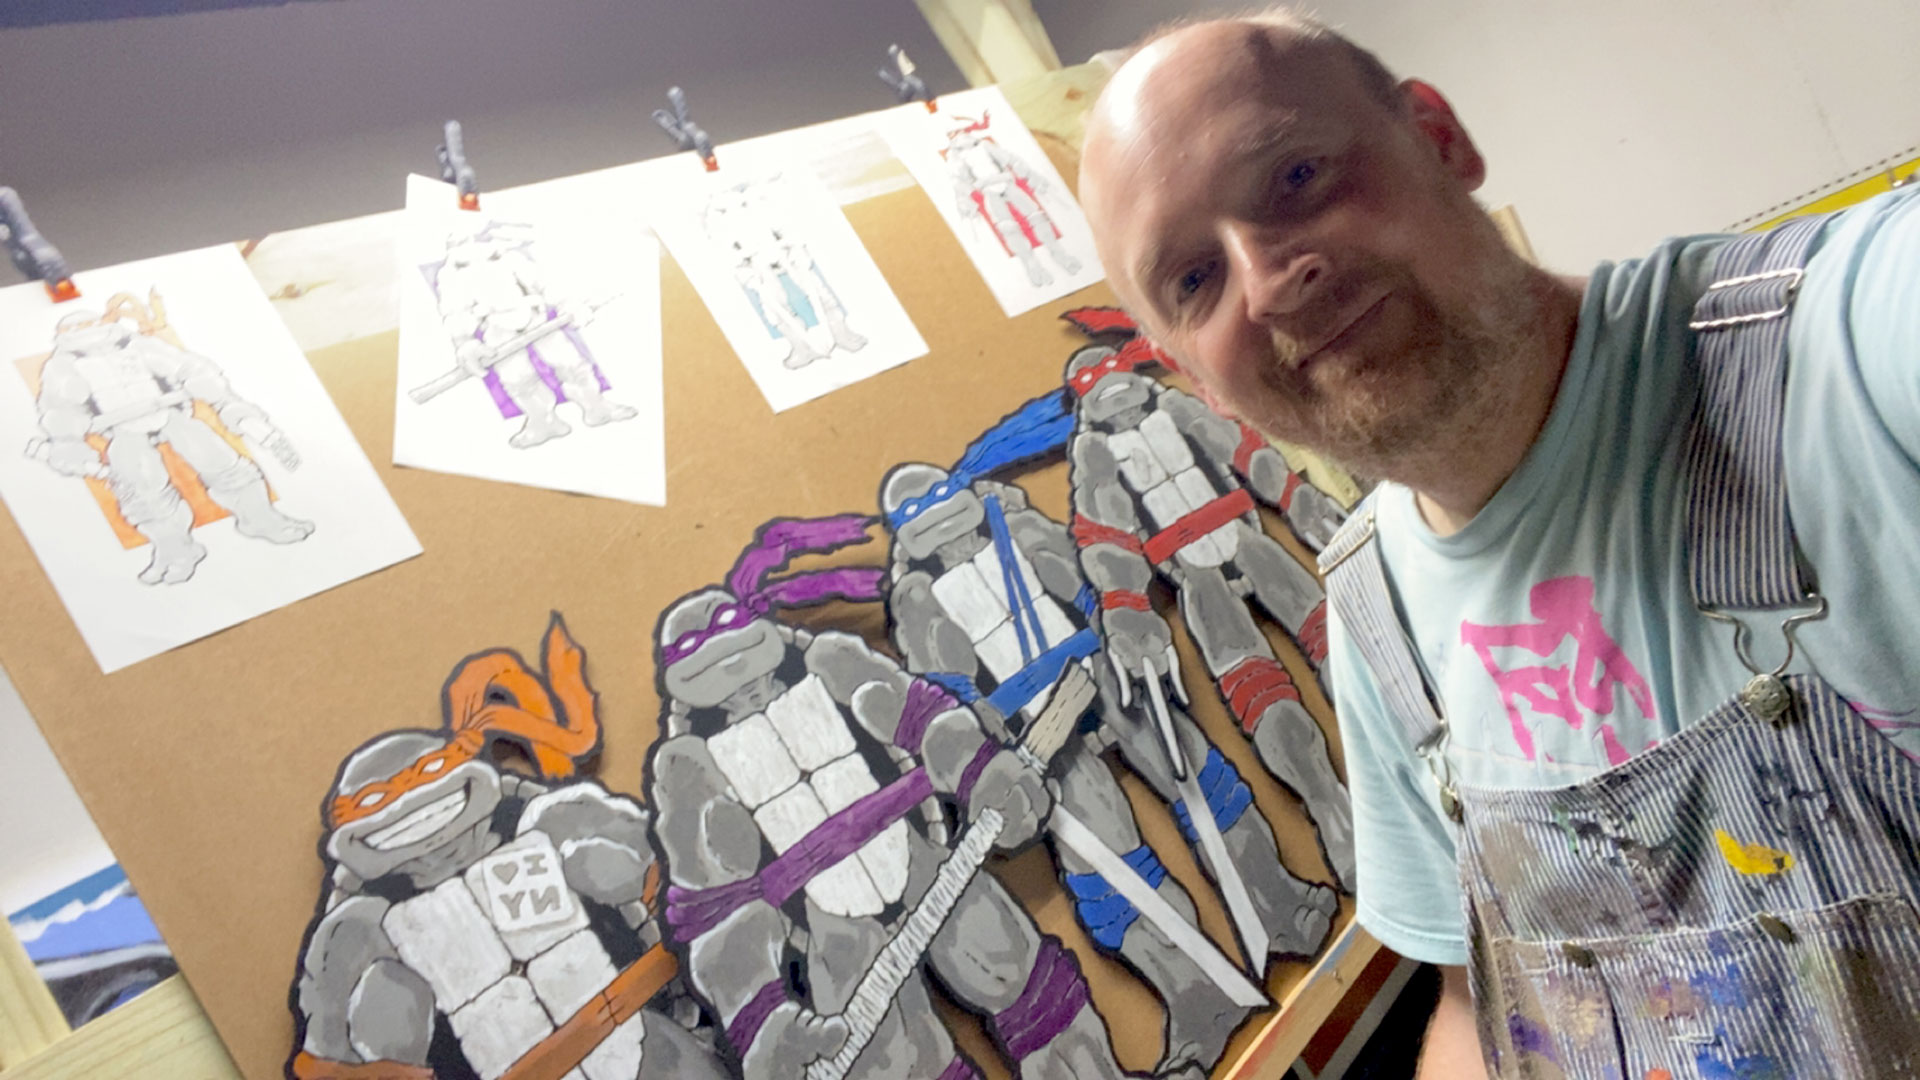
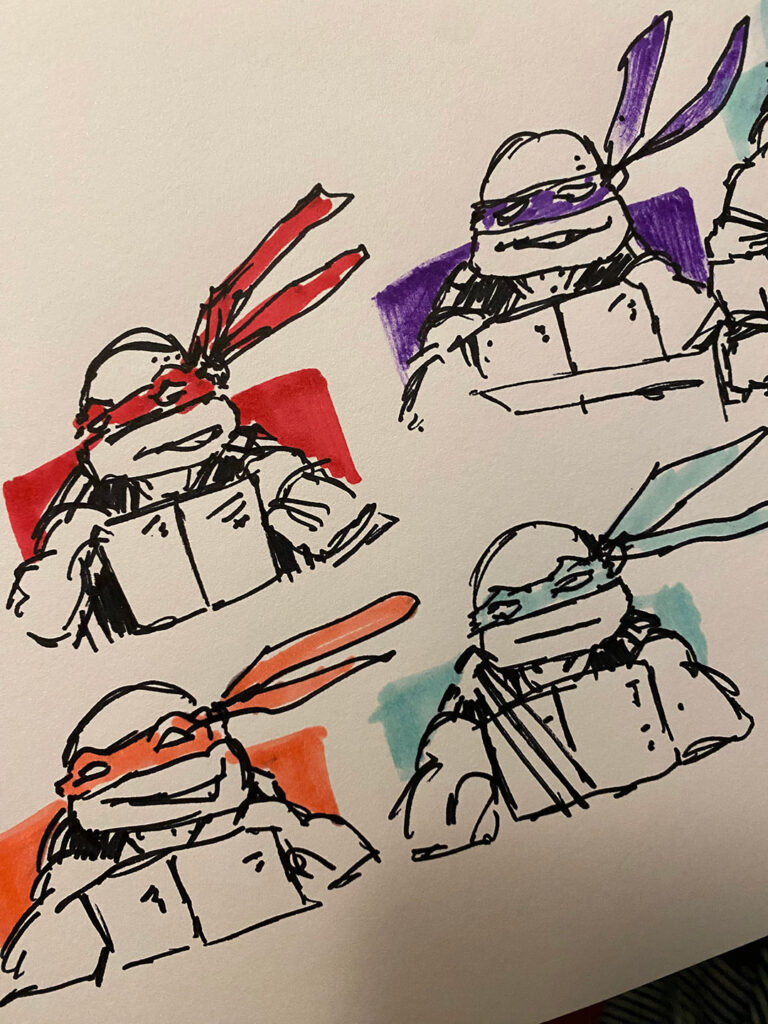
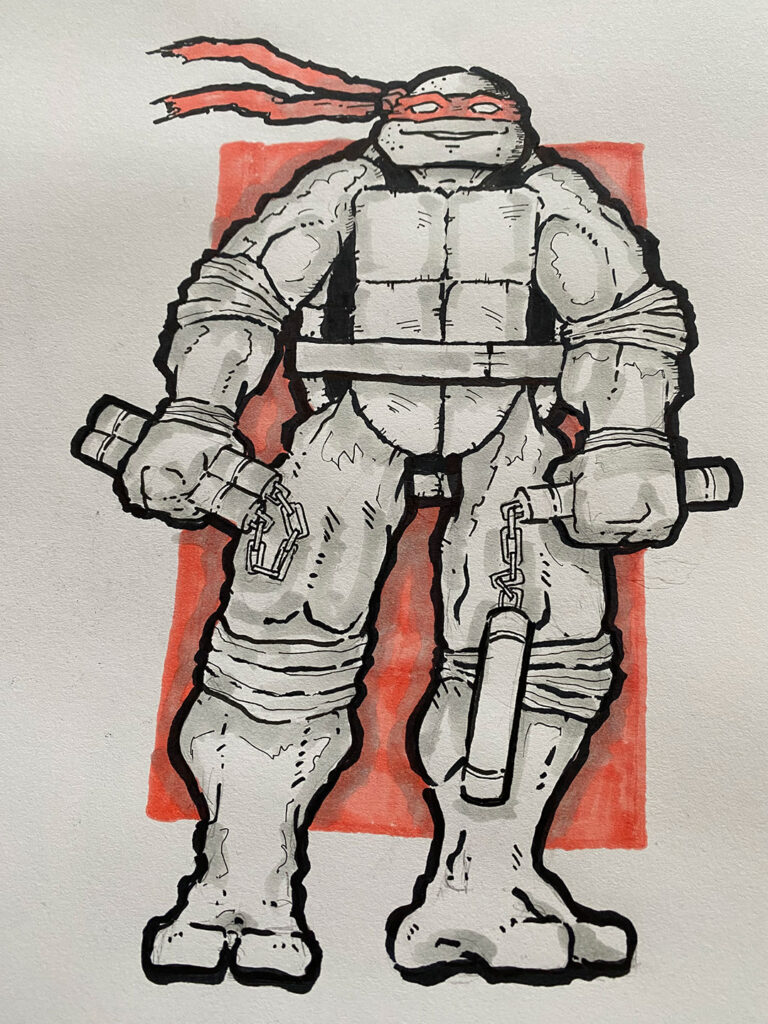
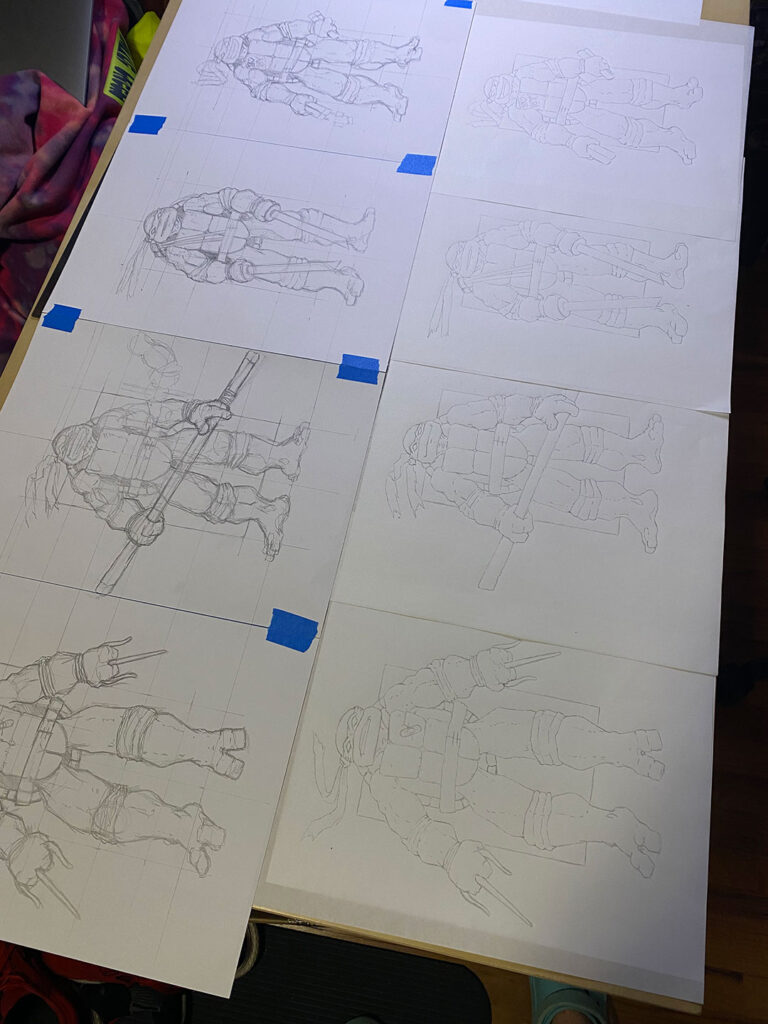
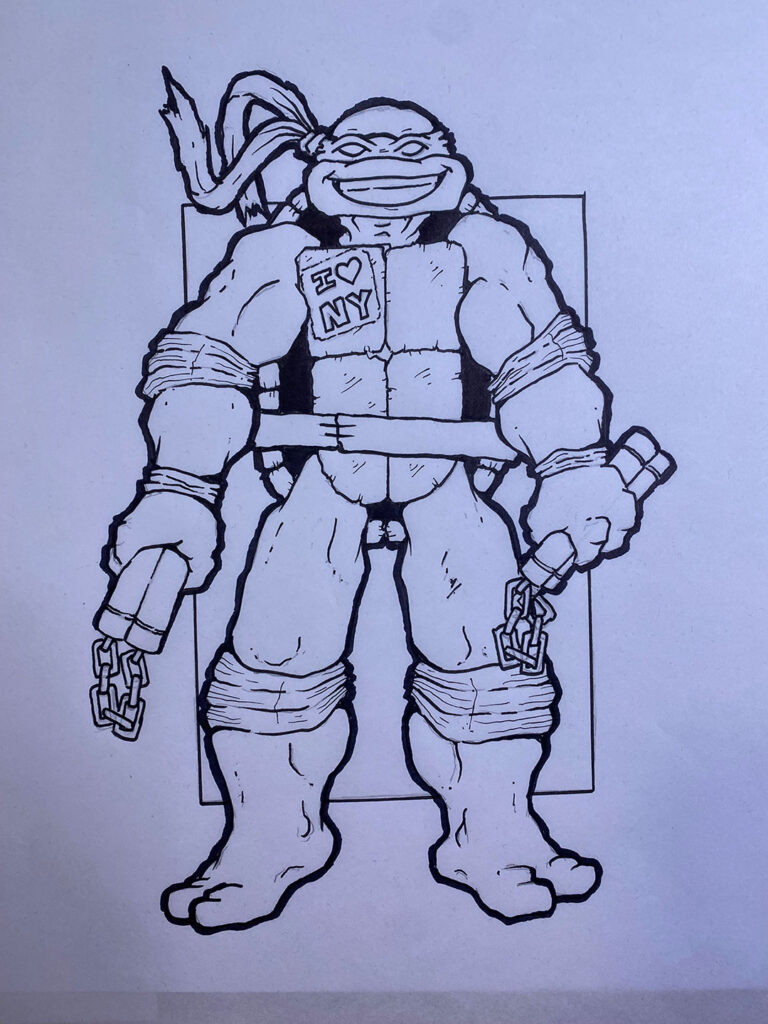
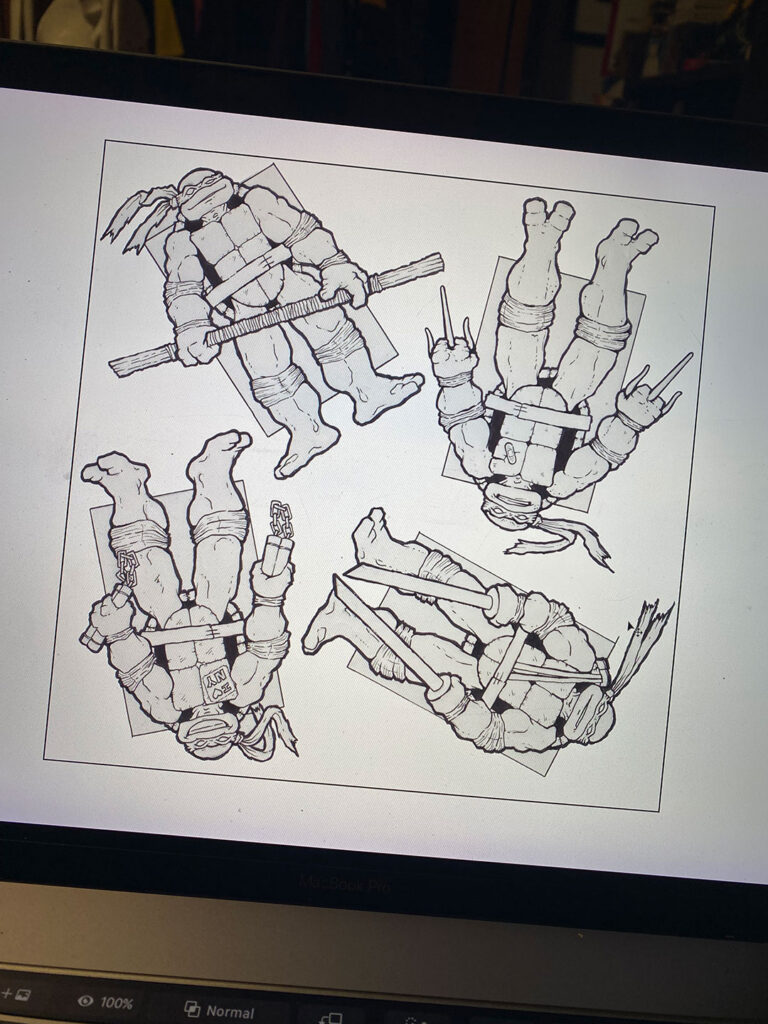
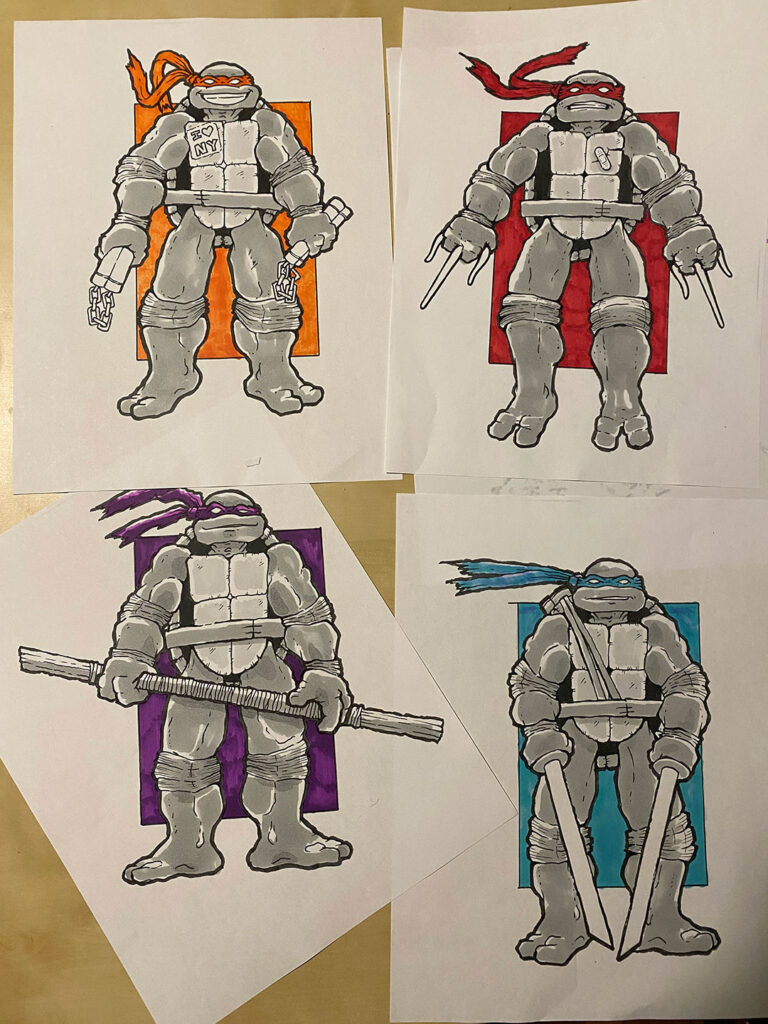
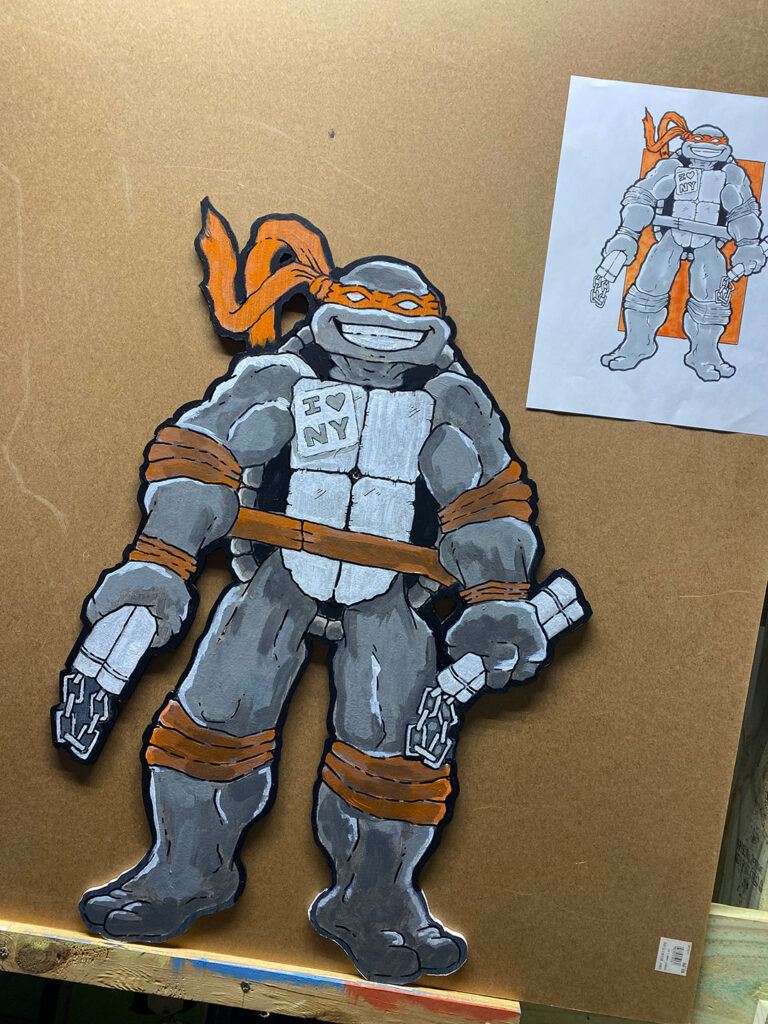
I spent about a week just thinking about what cartoon I wanted to paint for the Cartoons and Cocktails show. Finalists were Teenage Mutant Ninja Turtles and The Adventures of the Gummi Bears. After settling on a topic, I spent another week conceptualizing and sketching out my ideas using pencils and markers to present the turtles in a unique way. With a final direction decided, I worked out the final drawings (I almost always use 4H lead) and then inked them using a combination of Tombow and Pigma Micron pens. I used a character height template to make sure the final drawings would work together in their final form.


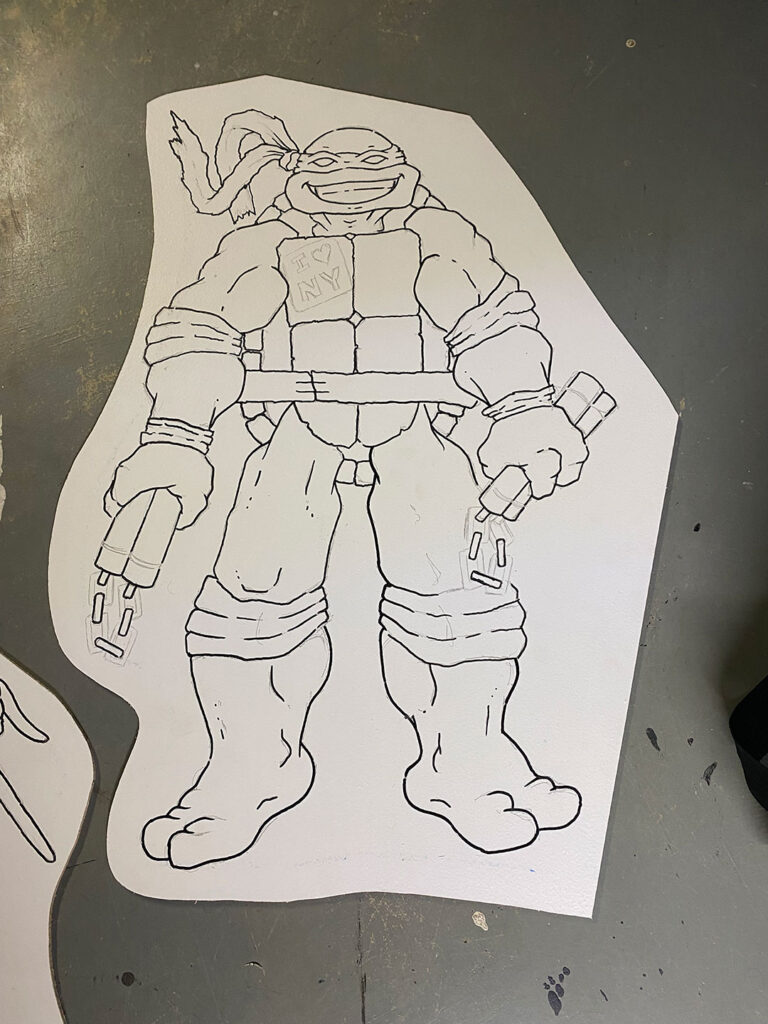
Part 2: computer composite, projecting, and cutting
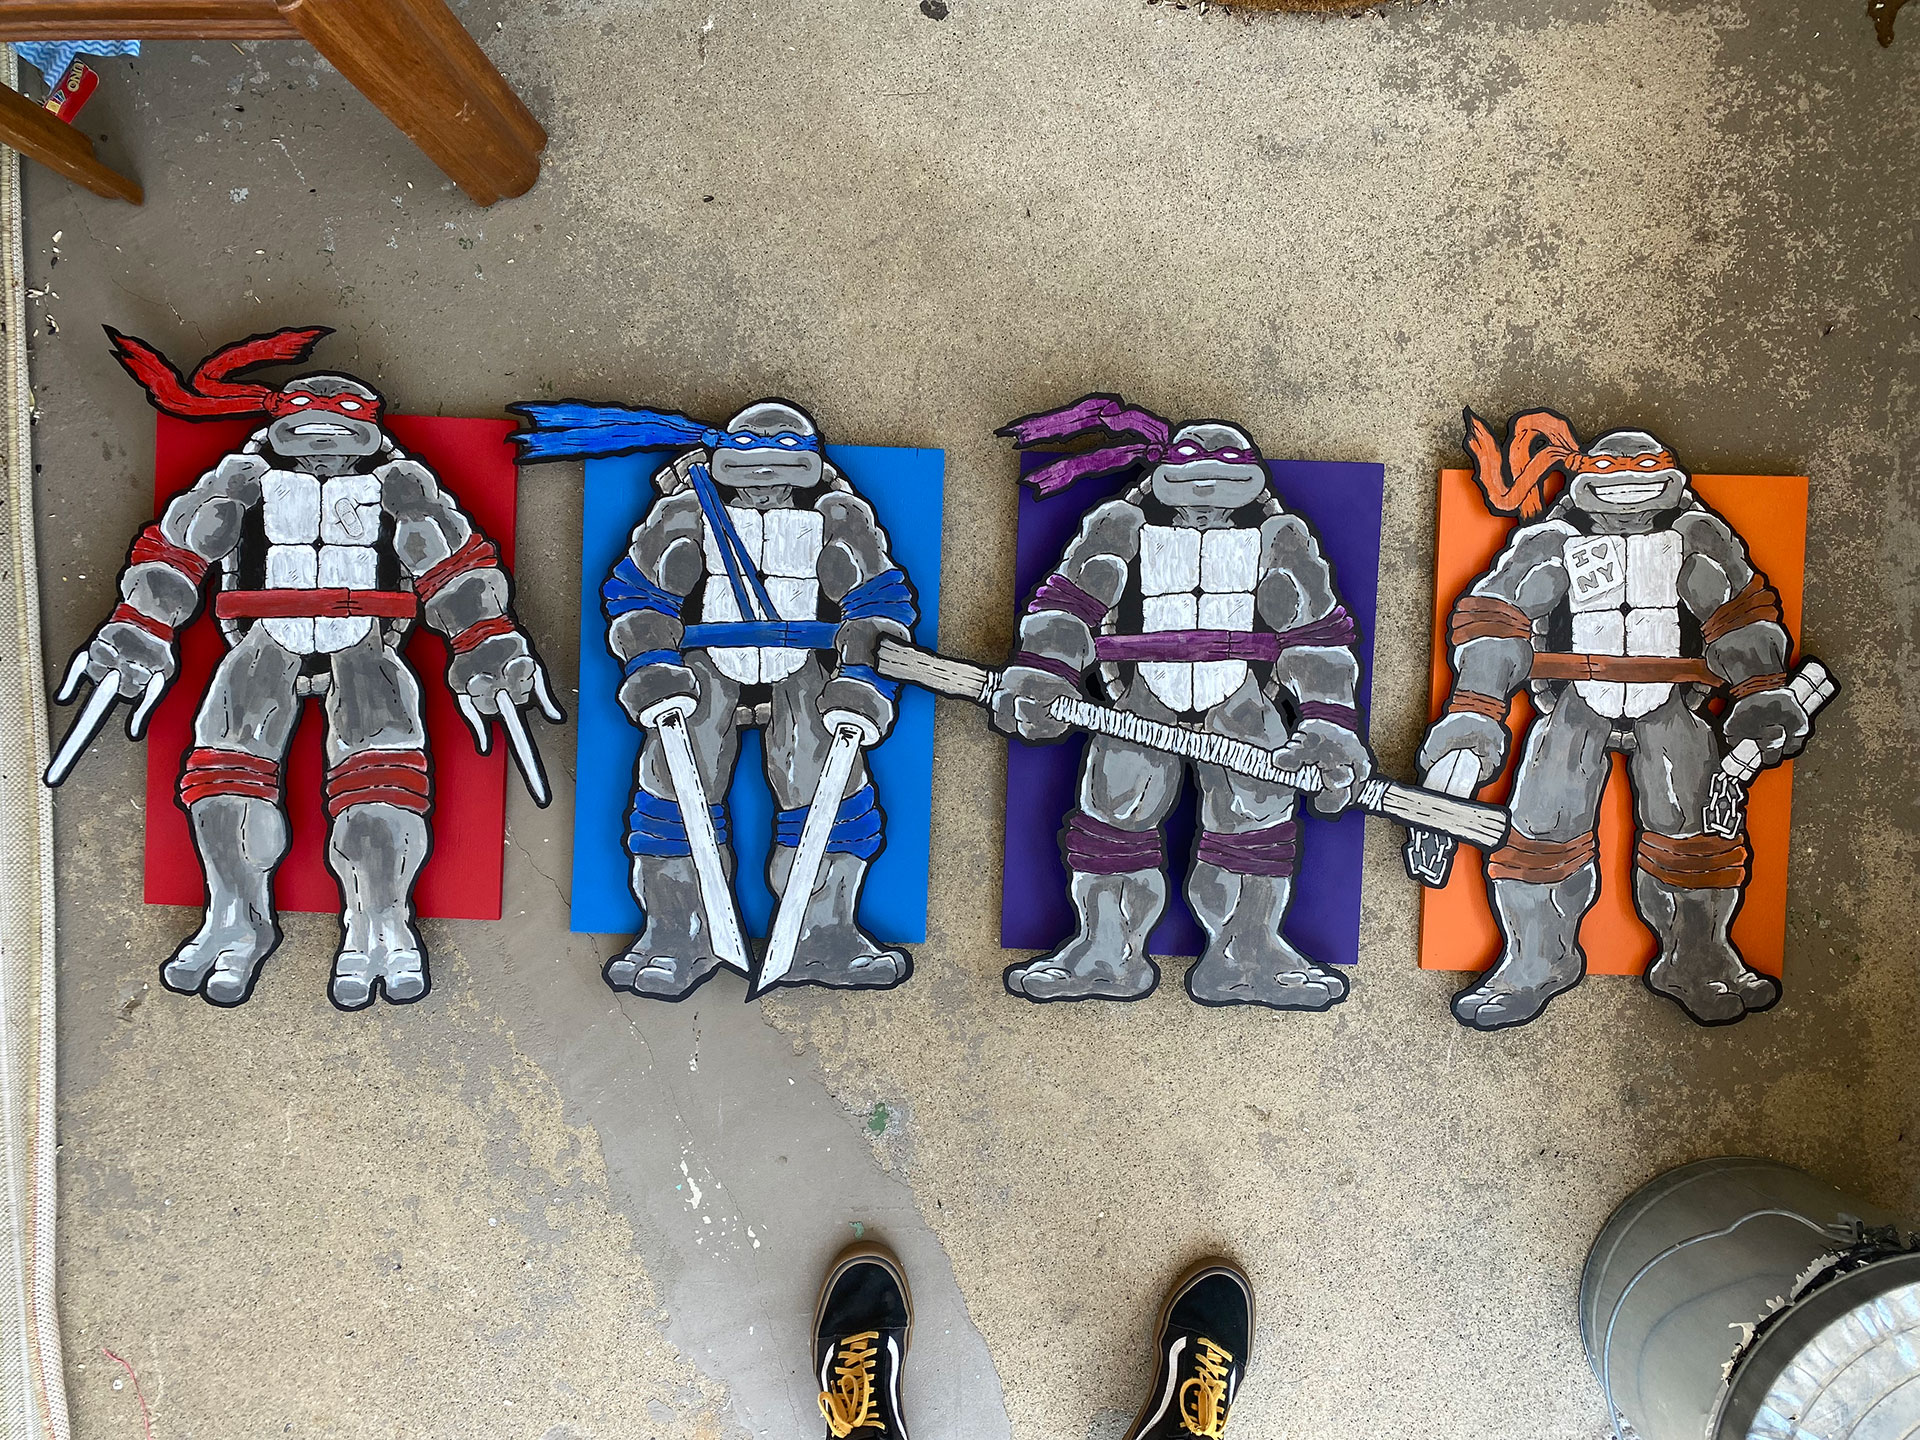
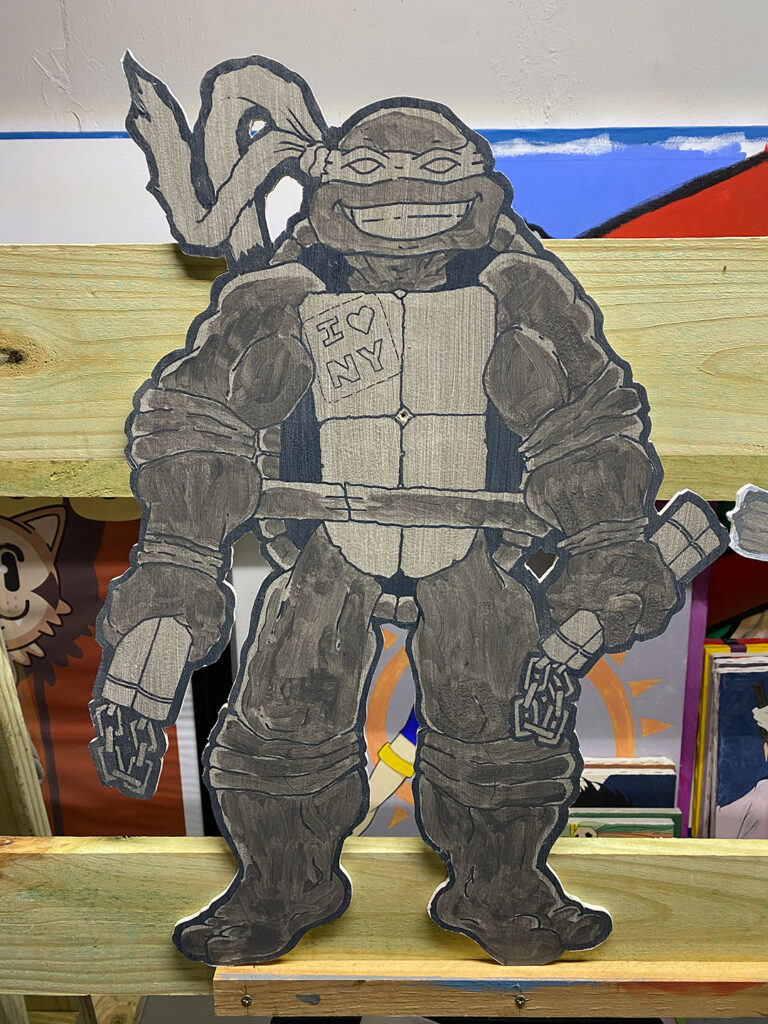
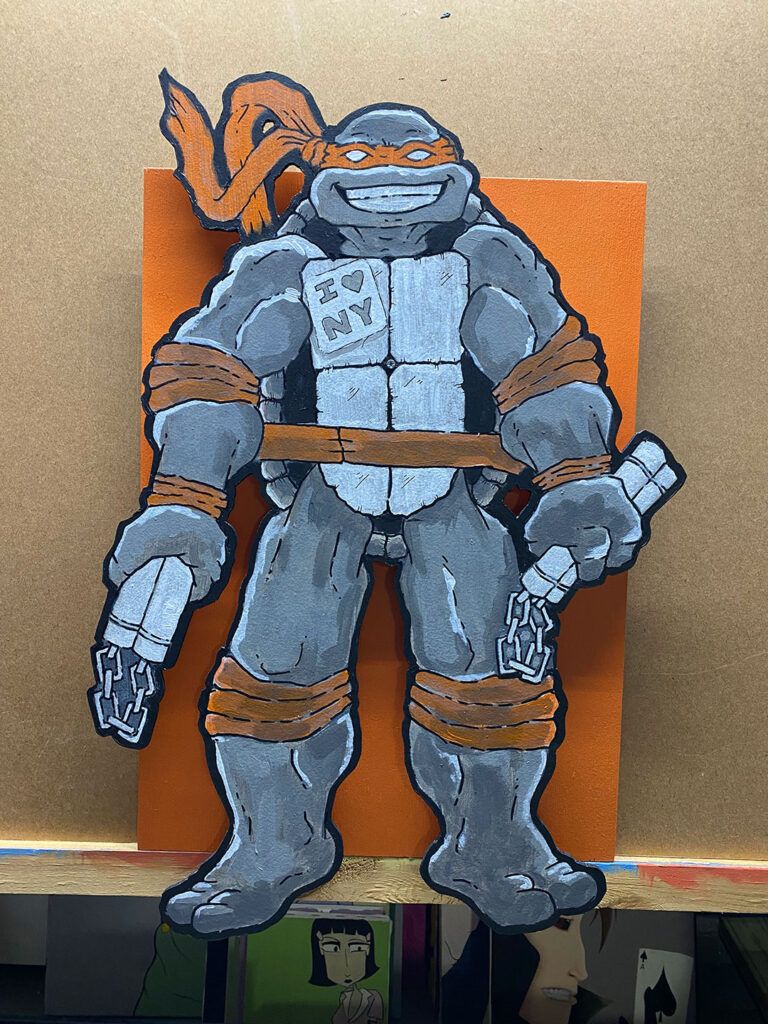
After finishing the final drawings, I composited them on the computer to prepare them for projection. Next, I primed and prepared a 4’x4’, 1/4” birch wood panel. I projected and traced the turtles onto the wood panel with a pencil. I rough-cut the turtles with my hand jigsaw so they’d be easier to work with on my easel. The rough cut was followed by retracing with paint markers and applying an acrylic paint outline. I applied a thin grey wash to add texture and depth to build upon later with paint. Once the wash dried, I did the detail cutting with my tabletop scroll saw.
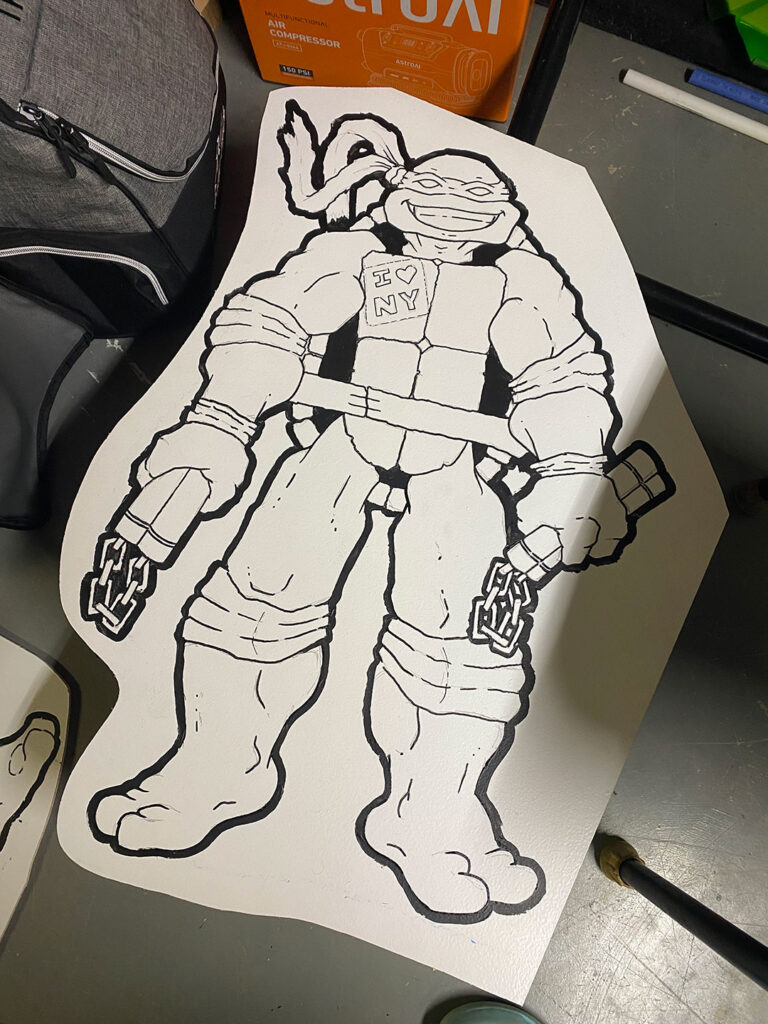
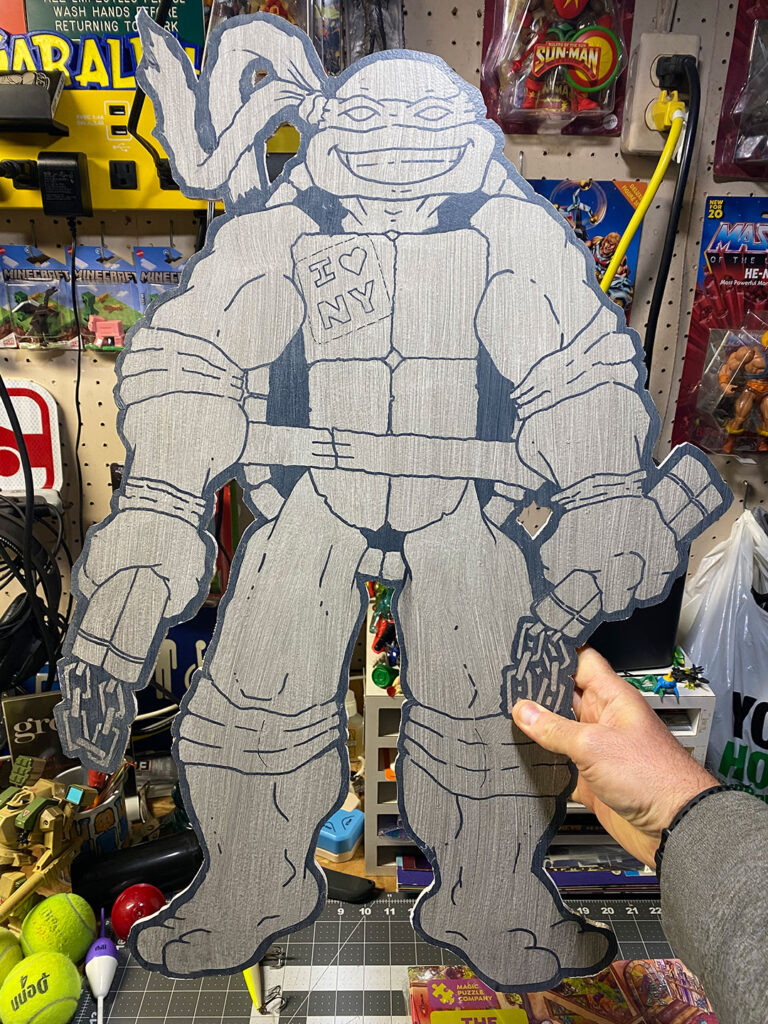
Part 3: sanding, painting, and mounting
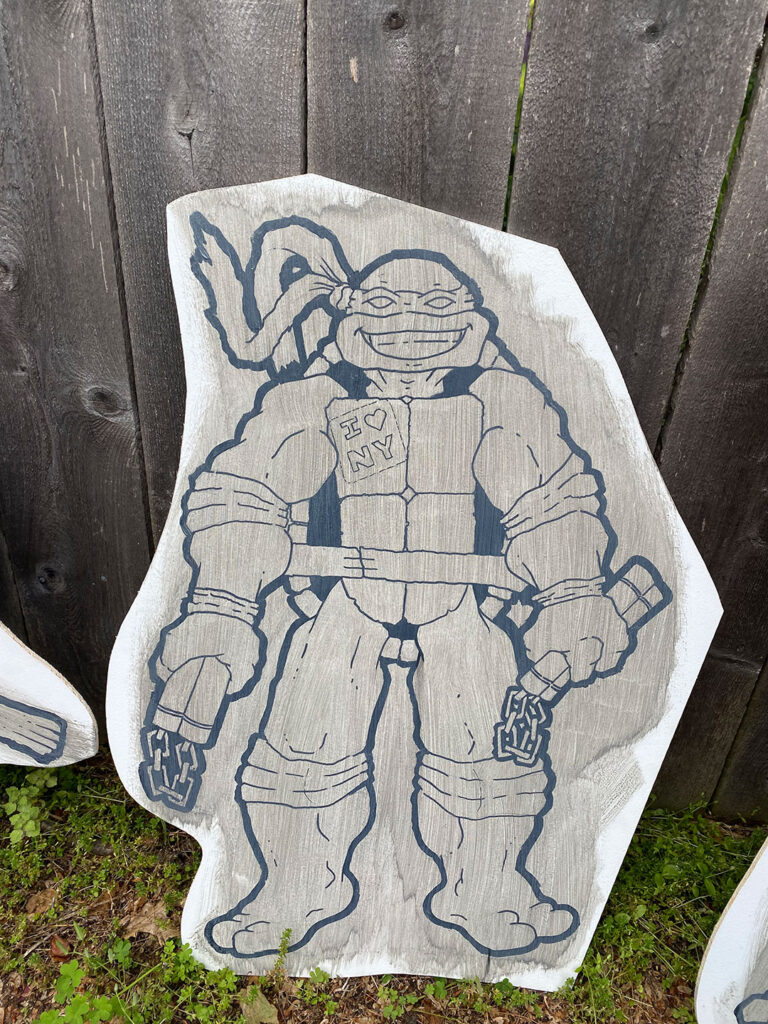
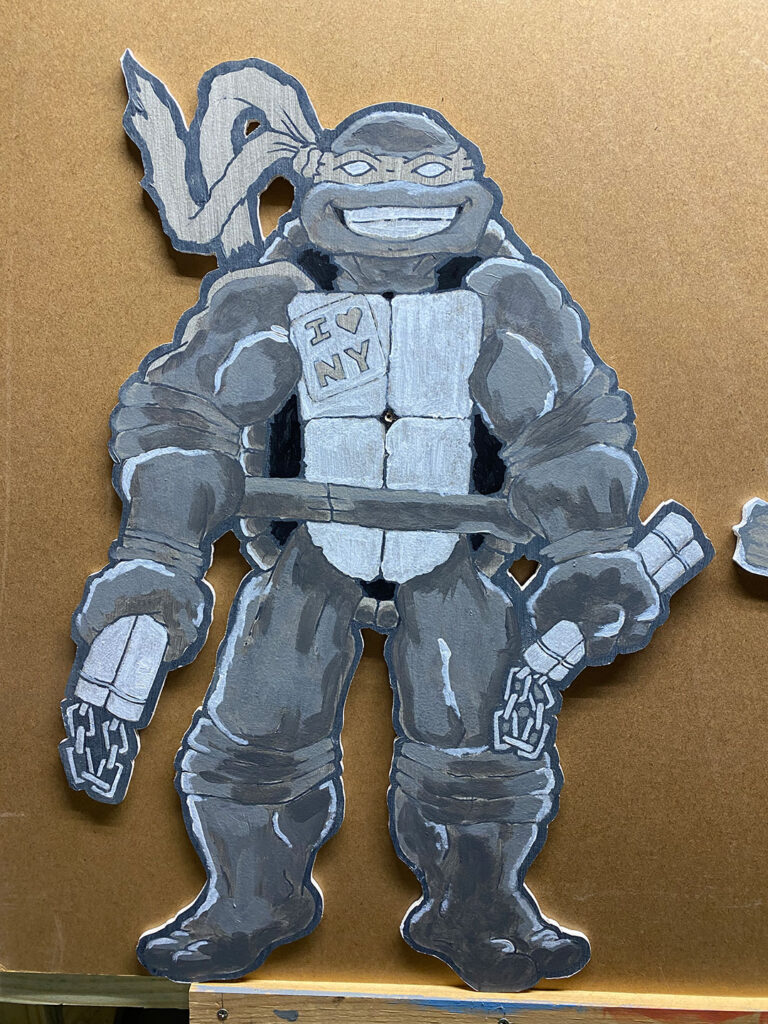
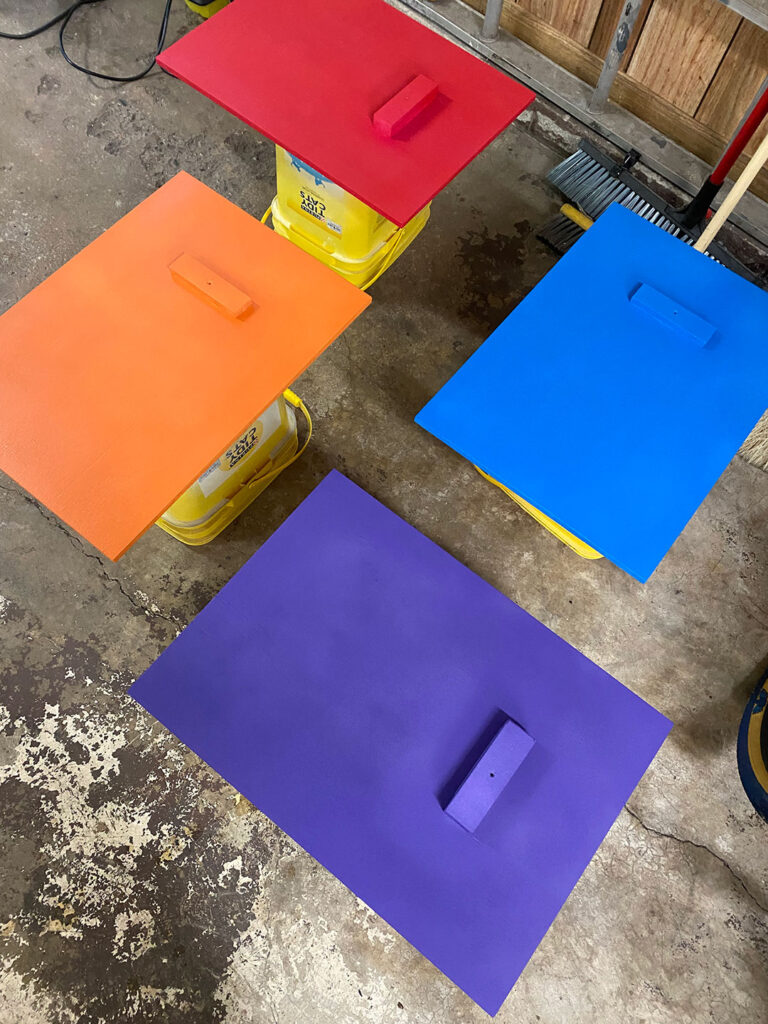
To practice getting the colors right, I photocopied my original work and colored it in with markers for reference when I started painting. I painted the edge of all the turtles black and while waiting for them to dry, I sanded and prepped the boards they’d be mounted to, 1/2” semi-finished plywood. I then worked out the process for mounting the turtles and adding hanging hardware. Using a combination of acrylic paint with brush and acrylic paint markers, I built up the black, white, and grey details using the grey wash as a base, which created some great texture. I worked on all four turtles at the same time in rotation to keep them consistent. Finished the pieces by adding the turtle’s individual colors, mounted them, and did any needed touch-up.
Save the Date:
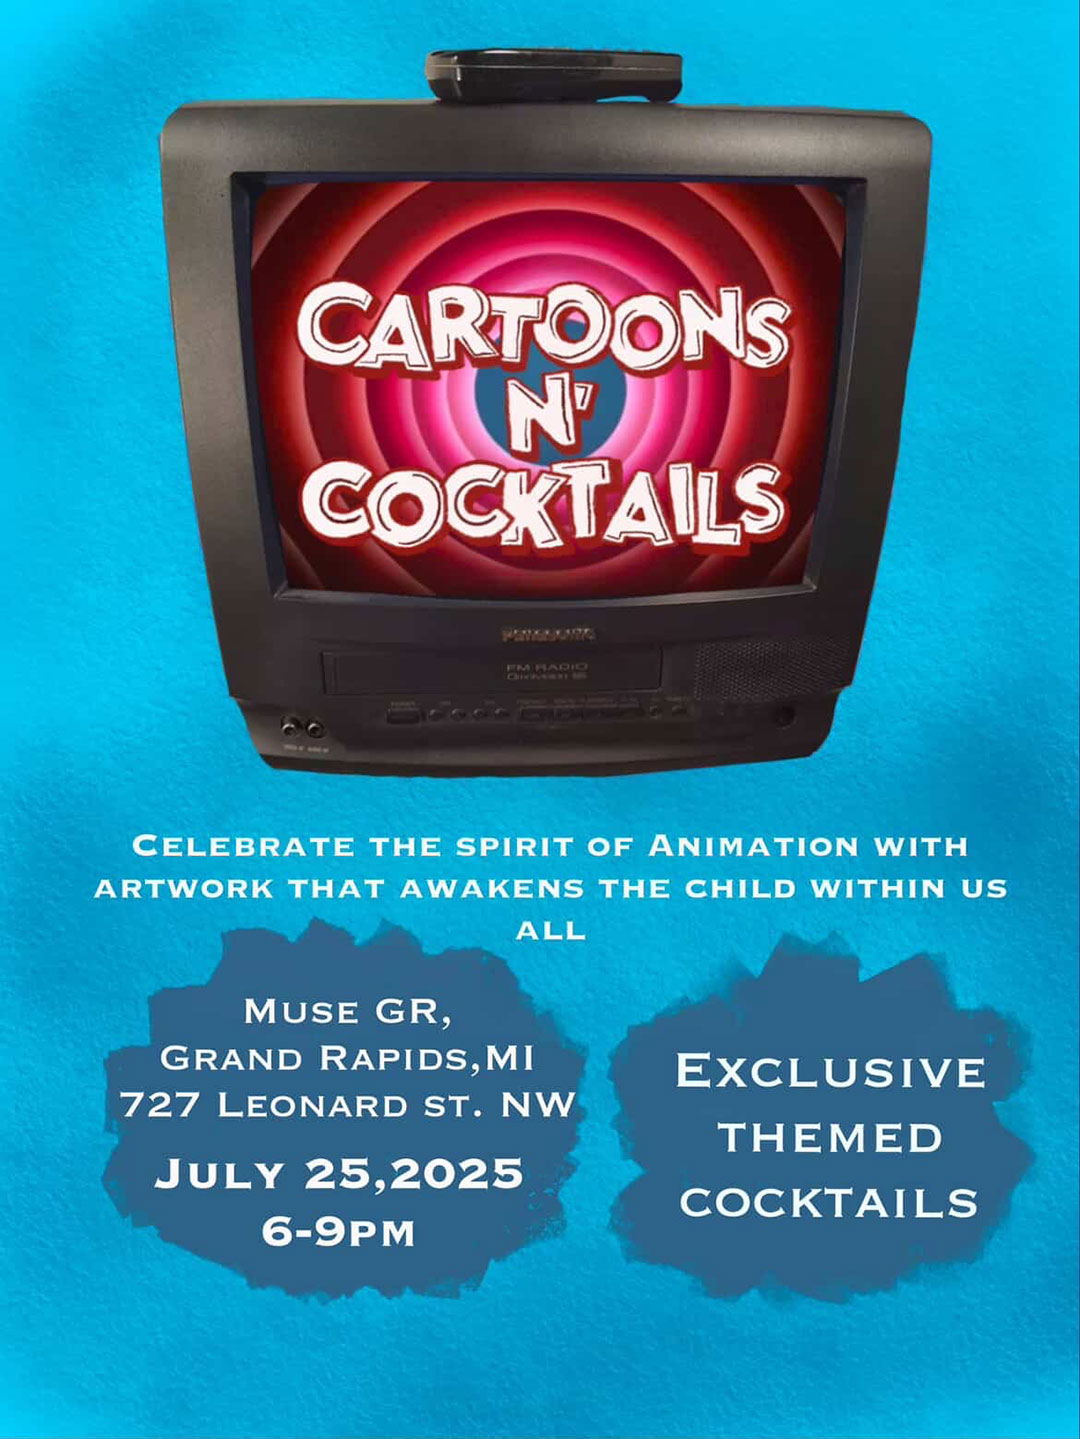
Cartoons and Cocktails
Muse GR
Grand Rapids, MI
727 Leonard St. NW
July 25, 2025
6-9 p.m.